I brought along my ever growing collection of Glimmer Mists to share with the group, and do kind of a mini class on the Cling Wrap Background Technique. The PDF handout for the class can be found here. We had a great time doing this technique, and everyone created some beautiful backgrounds. This was a good time for this mini class because this month, one of our swaps on the group, is for hand made background papers. So I signed up for that one of course. Can't wait to see what I get in the swap.
Here is a quick run-down of the class I did:
Supplies:
Cardstock (I used white) or Water Color paper, Glimmer Mists-2 or 3 colors, Cling Wrap, Paper Towels, Craft Iron, Brown Paper Bag or Craft Mat (to protect your work surface)
After gathering the supplies listed above, decide what colors you want to use for your background papers you will be creating. I personally use two or three colors that work well with each other. You can go for colors that compliment each other or contrast each other.
- Cover your work surface to keep it clean. I used my graph pad from Stampin' Up.
- Place your cardstock or paper in the center of the surface. Tear off a piece of cling wrap that is a few inches larger than your entire sheet you will be spraying. Set the cling wrap aside for now.
- Mix the bottles of Glimmer Mist that you have chosen to work with. Do this by "swirling" the bottles until the mica is mixed well throughout the liquid. Uncap all of the bottles you will be working with.
- Randomly spray the Glimmer Mists over the entire surface of the paper, careful not to muddy the colors. You want to completely cover the sheet with color, but spray so that your colors just barely meet or overlap.
5. Quickly cover the sprayed sheet with the cling wrap that you set aside in step number 2. You do
not want the cling wrap to be smooth. The more texture on the cling wrap, the more interest to
your finished product. This is why you want a piece of cling wrap larger than your paper you are
spraying. This will allow you room to "smoosh" and wrinkle the cling wrap.
6. Keep the paper covered with the cling wrap and leave to dry. You can set it aside and work on
another set of backgrounds or you can go work on something else until your paper is dry. The cling
wrap must remain on the sheet as it dries.
7. Again, if you are not the most patient person, like myself, you can dry up the last little bit of stubborn
dampness by aiding it along with your heat gun. Make sure you remove the cling wrap first!
8. Once the page is dry to the touch, you can smooth it out and prepare it for trimming down to size to
use on your project of choice. I smooth mine by covering it with a couple of paper towels and and
iron it flat with my craft iron.
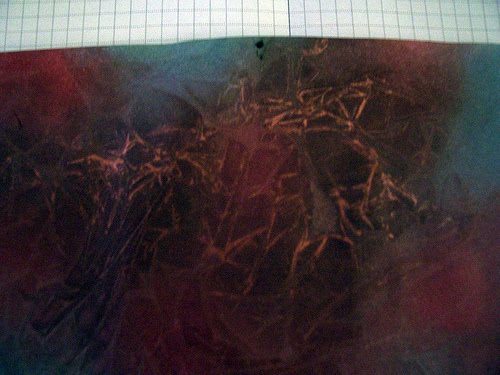
(here is a picture of a finished sheet. I did not have the patience to dry the sheet for the tutorial for a photo. The gold lines are the mica that is channeled into the wrinkles on the cling wrap.)
Now the give away! Who doesn't love free artsy stuff? I went a little crazy one afternoon and made a whole bunch of different color combos using this technique. So now I have a bunch in my stash. I will give anyone who leaves a comment on this post a chance to win one of two bundles of ATC size backgrounds. I have two bundles of 12. I will give anyone who becomes a follower on my blog a second entry in the drawing. I will use random.org to pick the winner(s) on Friday, May 21st. Good Luck!


